
9.2 KiB
Purpose
We're going to be looking at how to create a server setup file that doesn't trigger any prompts that aren't user friendly. This setup file will contain another signed file that will launch a basic web server. The setup file will create the server file and a firewall rule for the server file. We will be building two files (setup.go and server.go) separately .
The Server File
We're creating our web server file, building it and signing the application.
Creating the Server File
First of all, you'll want to install Golang: https://golang.org/dl/ and Git for Windows: https://git-scm.com/download/win
Then you'll want to install goversioninfo by running the following in a command prompt:
go get github.com/josephspurrier/goversioninfo/cmd/goversioninfo
This will allow us to set the name of the program, version, publisher name, etc.
Download server.go by running the following in a command prompt:
# Download the server file.
powershell -Command Invoke-WebRequest -OutFile server.go https://git.rootprojects.org/josh/code-signing-final/raw/branch/master/All/server.go
Custom Port
If you want the server to listen on a port other than port 80, you can edit this line in the server.go file:
port := flag.String("p", "80", "port to serve on")
Change "80" to whatever port you want to use.
Version Info
# Download a pre-made config file for goversioninfo:

powershell -Command Invoke-WebRequest -OutFile versioninfo.json https://git.rootprojects.org/josh/code-signing-final/raw/branch/master/All/versioninfo.json
This will create a configuration file named versioninfo.json in the current directory. There are three things you will want to edit: 1. The version of the application, 2. The "publisher" or company name and 3. The product name.
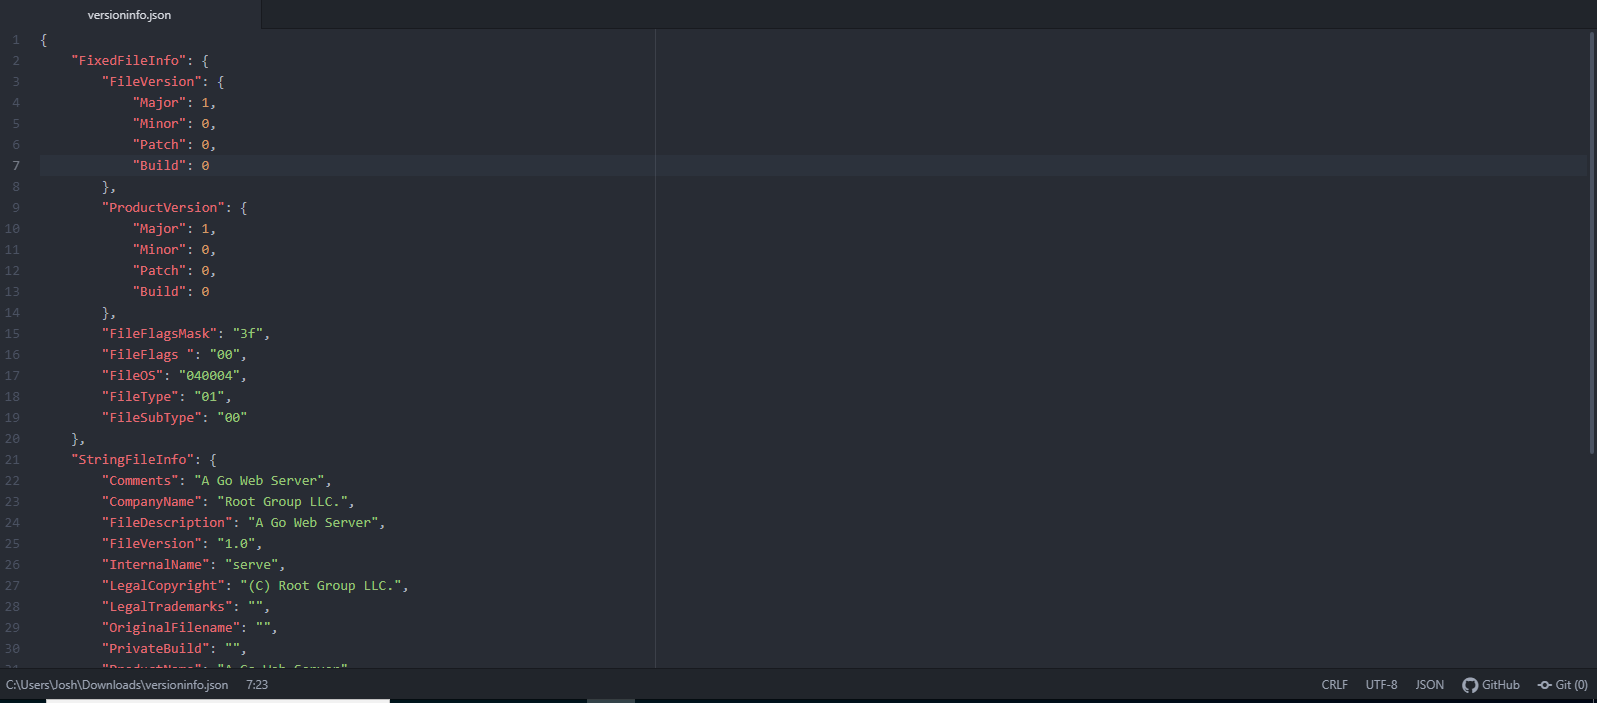
Near the top of the file, you will see FileVersion and ProductVersion.
You can set normal major, minor, patch and build versions for those values. The FileVersion is the version of the file and ProductVersion is the version of the application as a whole. You can most likely use the same version for both unless you're doing something unusual. You will set the same values again under StringFileInfo.
Next, you can set the "publisher name" by filling in the CompanyName value with the name of your organization.
Lastly, you can give your application a name, like "Go Web Server" under the ProductName value.
Create an Icon for You App
Grab the picture you want to use and go to: http://www.genfavicon.com/
Click on “Browse…” Select the picture you want to use, then click “Open”. Then click on the “Upload Image” button. Your image should pop up in the upper right hand corner. You will then need to click and drag on the little boxes around your image to get it to select the whole image properly. Below that, you should see “2 Cut & Preview”. Under this heading, you should be able to select a size. Select “48×48”. Then click “Capture & Preview”. You should then see an option just to the left of that saying “Download: favicon”. Save it as a .ico file. You can then open versioninfo.json and add that filename to the value for IconPath.
Building the Server File
# Generate the info goversioninfo needs by running the following in a command prompt:
go generate
# Next, build your server app.
go build -o server.exe -ldflags "-s -w -H=windowsgui"
You will want to sign your application, the next section will show you how.
Signing the Setup File
Getting a Code Signing Certificate
You need to create a Dun & Bradstreet listing to get an "organization" code-signing certificate: https://www.dandb.com/businessdirectory/products/ (this is free)
You can purchase a code-signing certificate here: https://cheapsslsecurity.com/comodo/codesigningcertificate.html
Select the number of years you want the certificate to be valid for (you'll pay per year). Add it to your cart. It'll add you for billing address and payment information. Then it will ask to you enter your business information and street address as well as the mailing address of the company. Then it will have you request a certificate. You must use the exact same browser to request and collect the certificate.
You can view the status of your order by going to your account: https://cheapsslsecurity.com/client/ordersummary.html
If you scroll down, you will see something like this:

Click on the paper and magnifying glass on the right side to view the status of your order.
You should see:
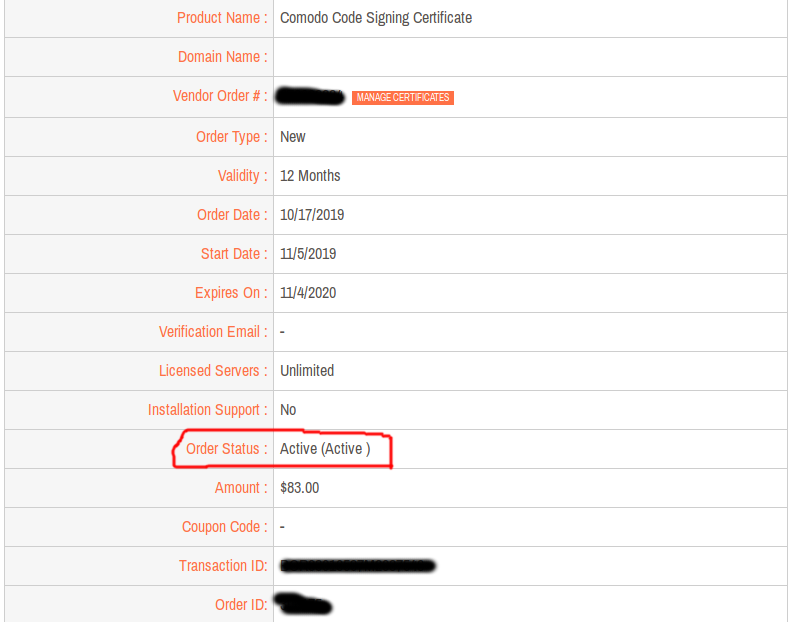
Under "Order Status", it should either saying "Pending (Awaiting Validation)" or "Active". If your certificate is active, you are ready to follow these instructions to collect the certificate: https://cheapsslsecurity.com/downloads.aspx?ispdf=true&iscs=true&filenm=Comodo_Code_Signing_Collection_Guide.pdf
Please note that you will need to use the exact same browser to collect the certificate as the one you used to request it. The validation process will take 1-3 business days. If it takes longer than that, reach out to their support team.
Put this certificate in the same folder as your server.exe file.
Signing the File
Next, you will need to install the Windows 10 SDK. You can download that here: https://go.microsoft.com/fwlink/p/?linkid=2083338&clcid=0x409
Click through the installer until you get to:
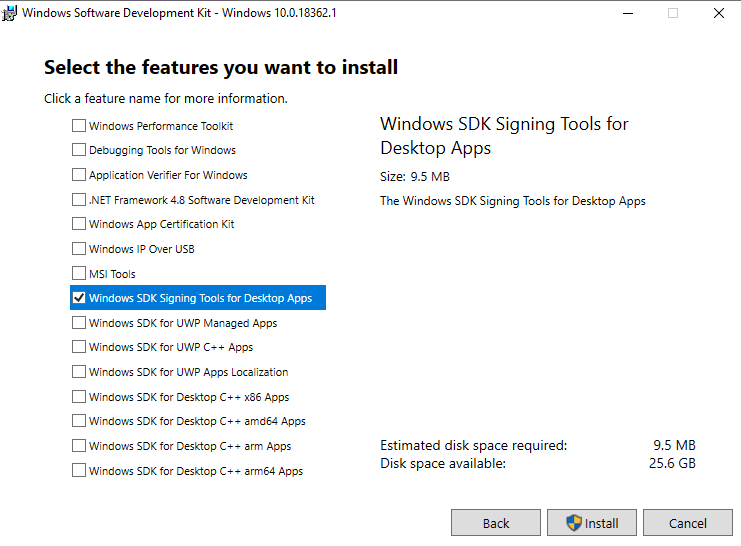
Click install.
You'll want to replace signtool.exe in the example below with a path to signtool.exe on your machine. It should look like "C:\Program Files (x86)\Windows Kits\10\bin\10.0.18362.0\x64\signtool.exe" but you may well have a different number for 10.0.18362.0. Run the following in a command prompt:
# Sign a file with your certificate. Replace the code-signing certificate and password values with your own.
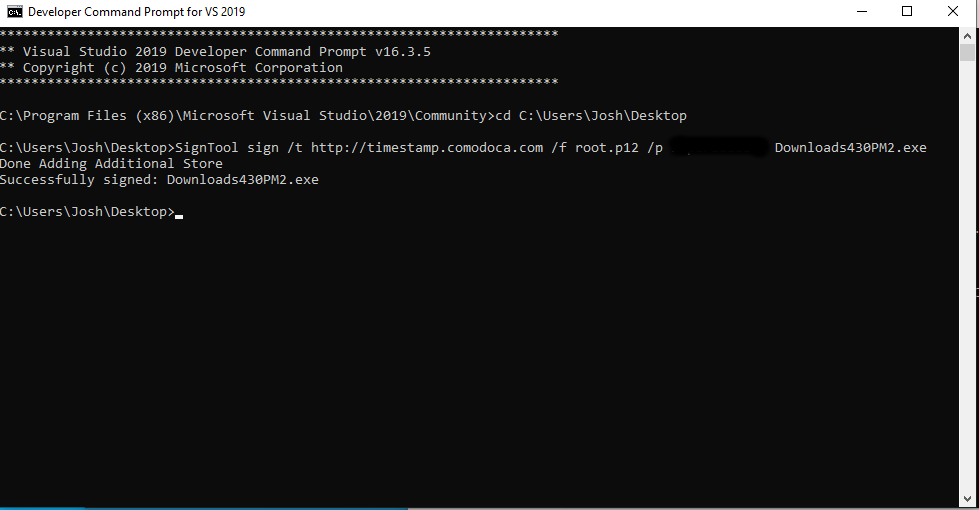
signtool.exe sign /t http://timestamp.comodoca.com /f codesigning.p12 /p <Password> server.exe
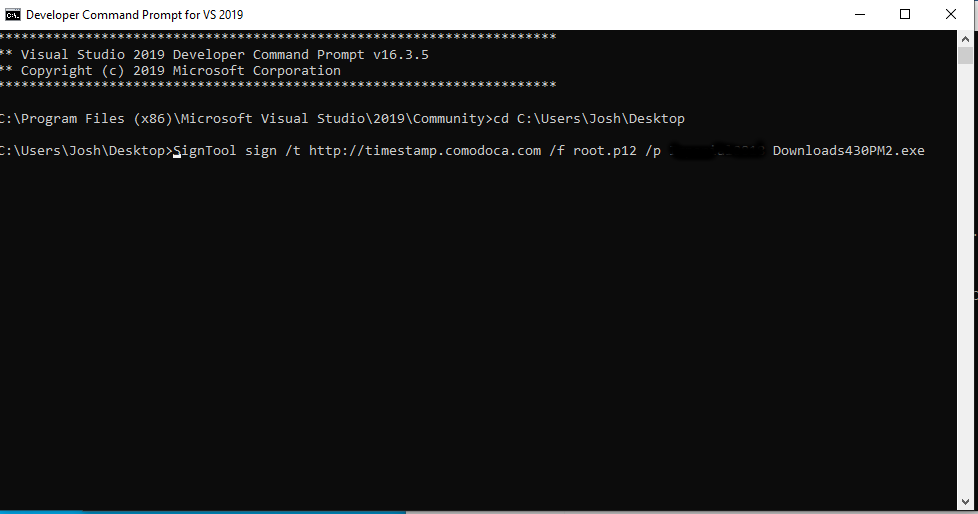
You should see something like this:
The Setup File
Now we're going to create the setup file that will create the firewall rule we need and "create" the server file for us.
# Download the server file.
powershell -Command Invoke-WebRequest -OutFile setup.go https://git.rootprojects.org/josh/code-signing-final/raw/branch/master/All/setup.go
# And the manifest file to allow it to have administrator privileges.
powershell -Command Invoke-WebRequest -OutFile setup.exe.manifest https://git.rootprojects.org/josh/code-signing-final/raw/branch/master/All/setup.exe.manifest
Rename server.go to server.go_
Put the Server File In the Setup File
We need to install fileb0x to be able to store our server file server.exe in our setup file setup.exe.
# Install fileb0x
go get -u github.com/UnnoTed/fileb0x
Download a pre-made configuration file by running this in the command prompt:
# Download the config file.
powershell -Command Invoke-WebRequest -OutFile b0x.json https://git.rootprojects.org/josh/code-signing-final/raw/branch/master/All/b0x.json
# Create a fileb0x
fileb0x b0x.json
This will create a folder named static with a file in it. You will then need to copy that folder to your $GOPATH/src/ (usually C:\Users\<Username>\go\src\).
# Use the right config for goversioninfo
go generate
# Build the setup application.
go build -o setup.exe -ldflags "-s -w -H=windowsgui"
Refer back to the instructions on How to Sign a File to sign your setup file as well. Then you're done! Just run setup.exe wherever you want it will setup your server for you. If you ever more server.exe, you will need to run setup.exeagain to setup a new firewall rule at a new location.
Changing the Password on a Signing File
If you want to change your password on a code-signing file you can use keystore in Linux like this:
keytool -importkeystore \
    -srckeystore "${SRCFILE}" -srcstoretype PKCS12 -srcstorepass:file ssp \
    -destkeystore "${DSTFILE}" -deststoretype PKCS12 -deststorepass:file dsp -destkeypass:file dsp
SRCFILE is the file you want to change your password on, DSTFILE is what the new file with the new password will be called. ssp is the password of the current file stored in a file. dsp is the password of the new file stored in a file. You will see something like this:
Importing keystore rootgroup.p12 to rootgroup2.p12...
Entry for alias the root group, llc’s sectigo limited id successfully imported.
Import command completed:  1 entries successfully imported, 0 entries failed or cancelled
You can find more information about how this works at the source: https://stackoverflow.com/a/50900084
Service
# Download the task file.
powershell -Command Invoke-WebRequest -OutFile Server.xml https://git.rootprojects.org/josh/code-signing-final/raw/branch/master/All/Server.xml
To change what file will be launched as administrator on boot, edit this line of the Server.xml file and replace the path in quotes.
<Command>"C:\Users\Josh\Downloads\server.exe"</Command>
Run a command prompt as administrator, then run:
# Create task based off the XML.
SCHTASKS /create /XML "Server.xml" /tn "Task Name"
You're done! It will launch your program as administrator by default on boot.